
This Milky Way photograph began with a single RAW file from my Nikon D850. Here is the equipment I used, the camera settings recorded in that file, and a comparison of the original camera preview with my finished Photoshop edit.
The Gear Behind the Photograph
- Camera: Nikon D850.
- Lens: Tamron SP 15–30mm f/2.8 Di VC USD, used at 15mm.
- Tripod: Explorer Photo & Video medium-duty carbon-fiber tripod.
- Capture timing: The D850’s built-in intervalometer. No star tracker was used for this photograph.
How I Captured This Frame
I took approximately 25 photographs using the camera’s built-in intervalometer. The finished image here comes from one frame in that series, MJO_4607.NEF. I did not combine or stack the photographs.
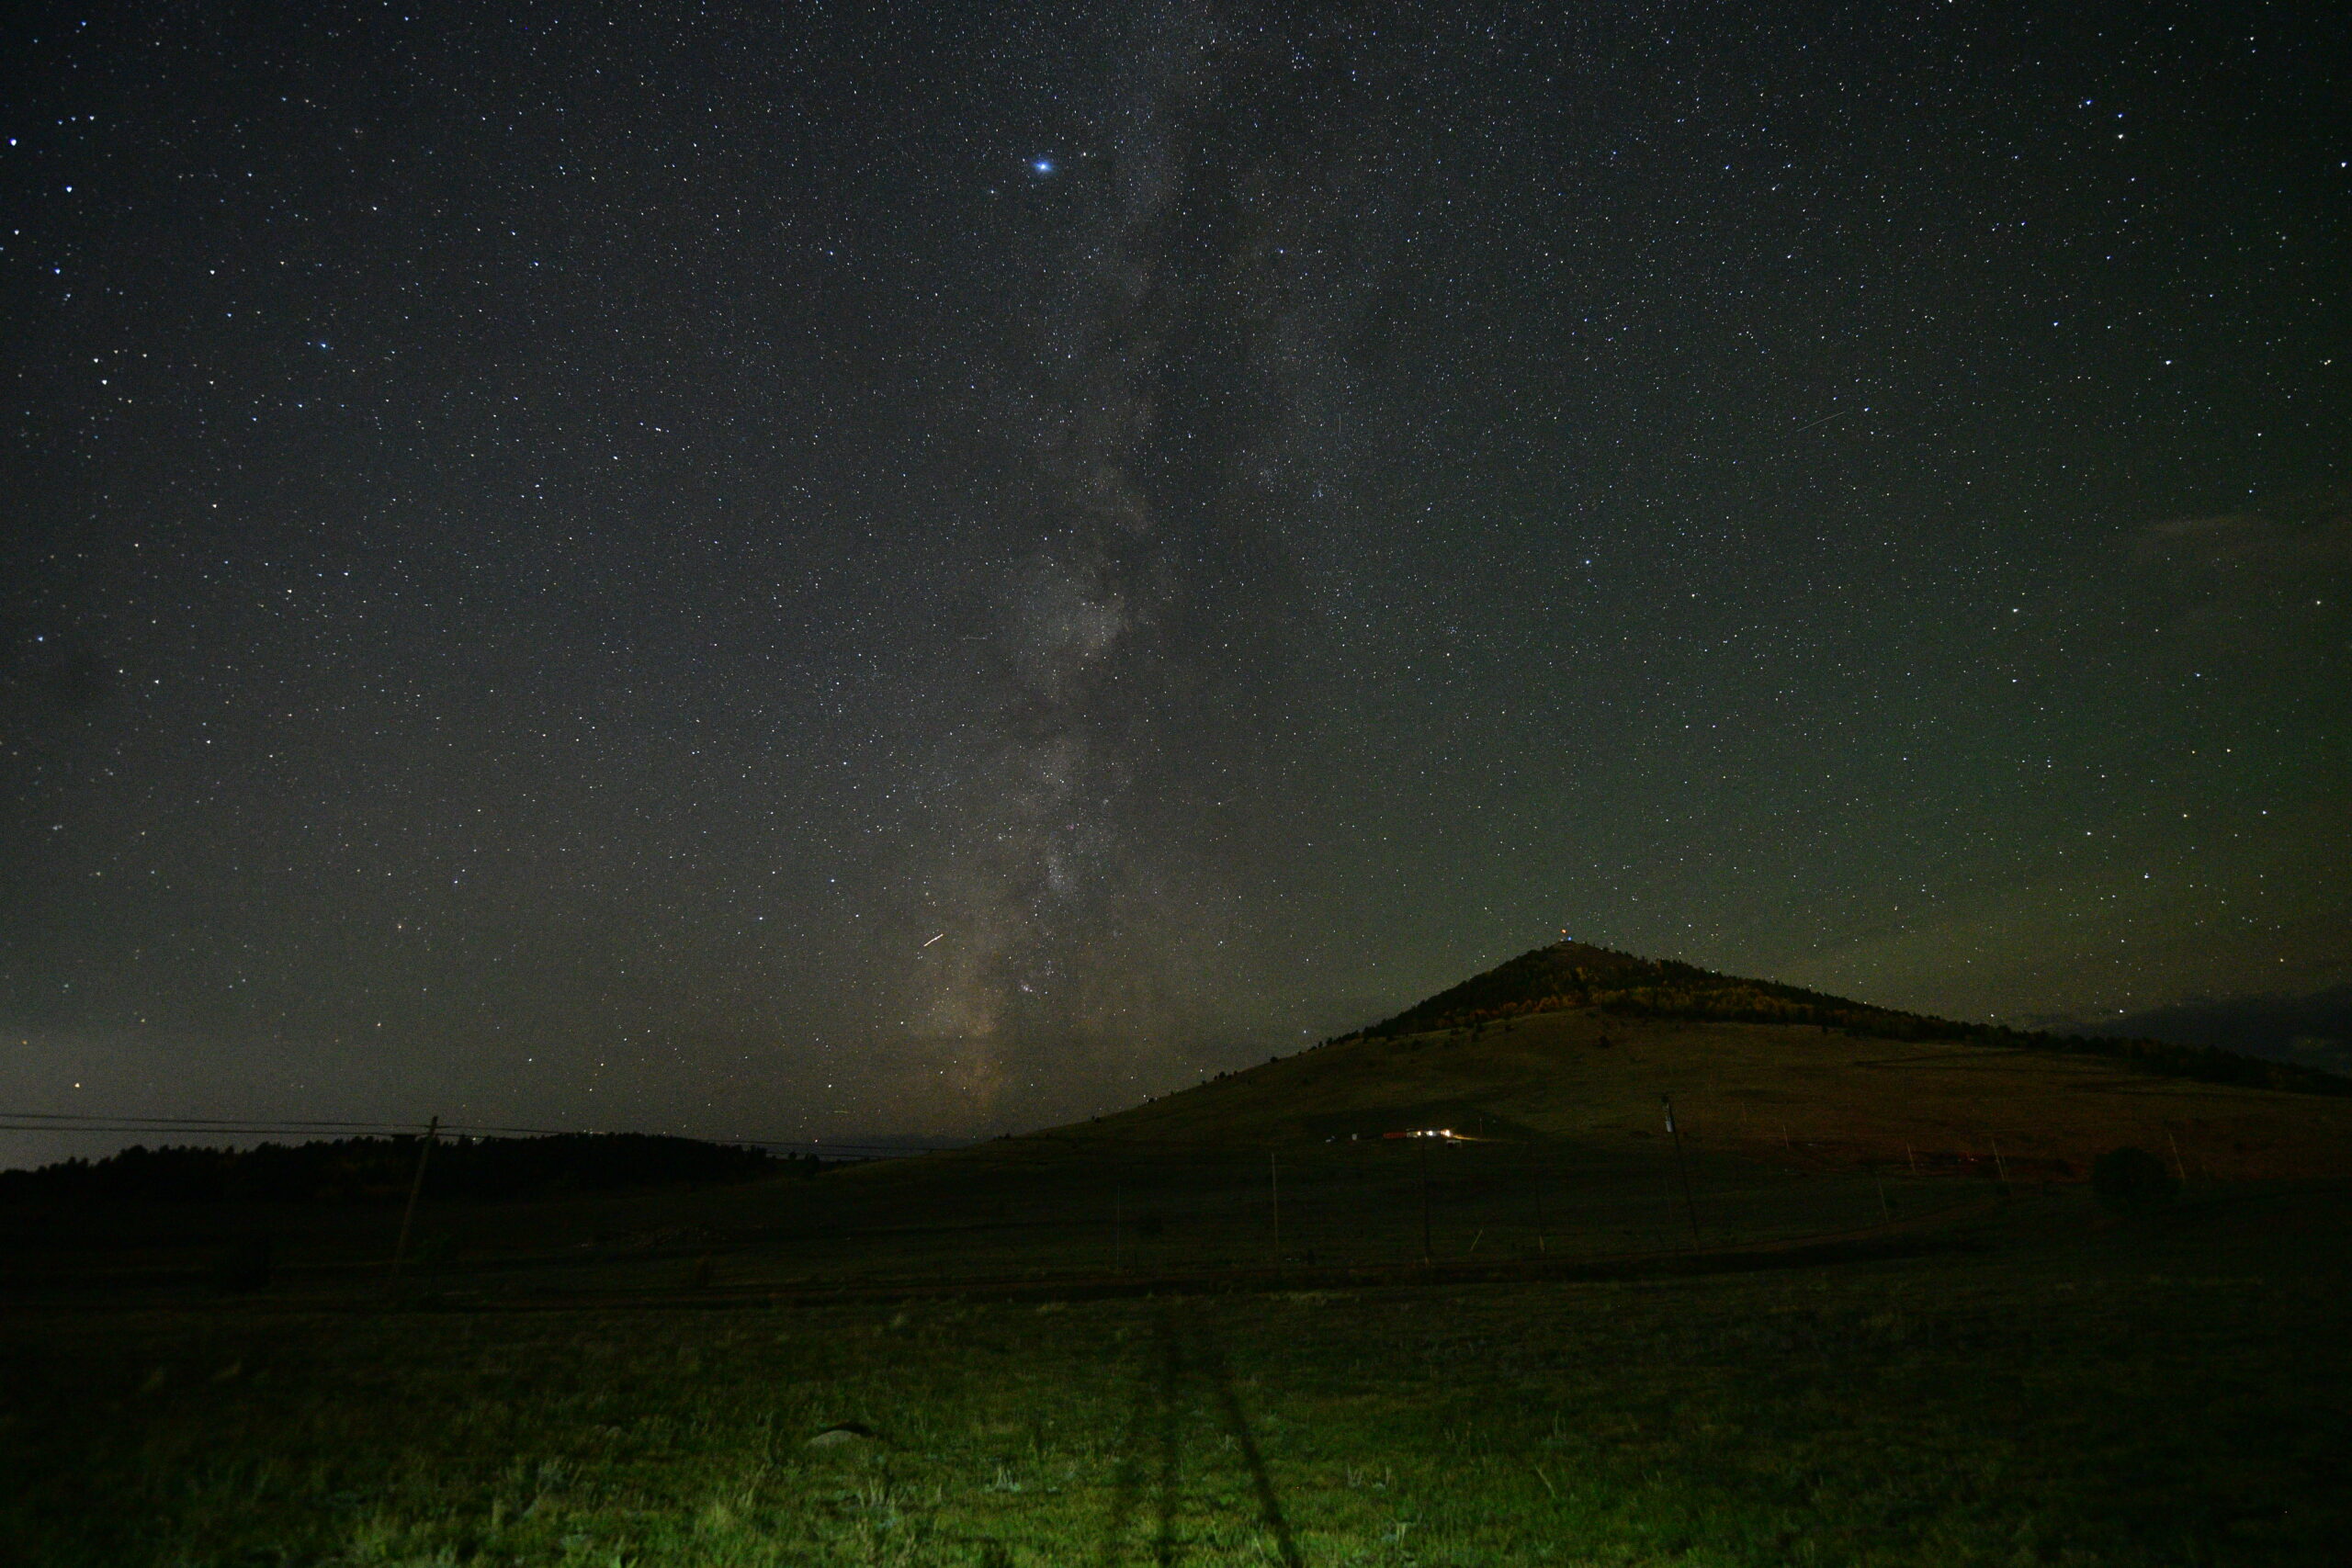
The original file records an 8-second exposure at f/2.8, ISO 5000, and 15mm, taken on October 7, 2026. These are the settings used when the photograph was captured. Brightness and other adjustments made later in Photoshop are part of the editing stage.
The Same Photograph Before And After Editing
Before: The Camera Preview
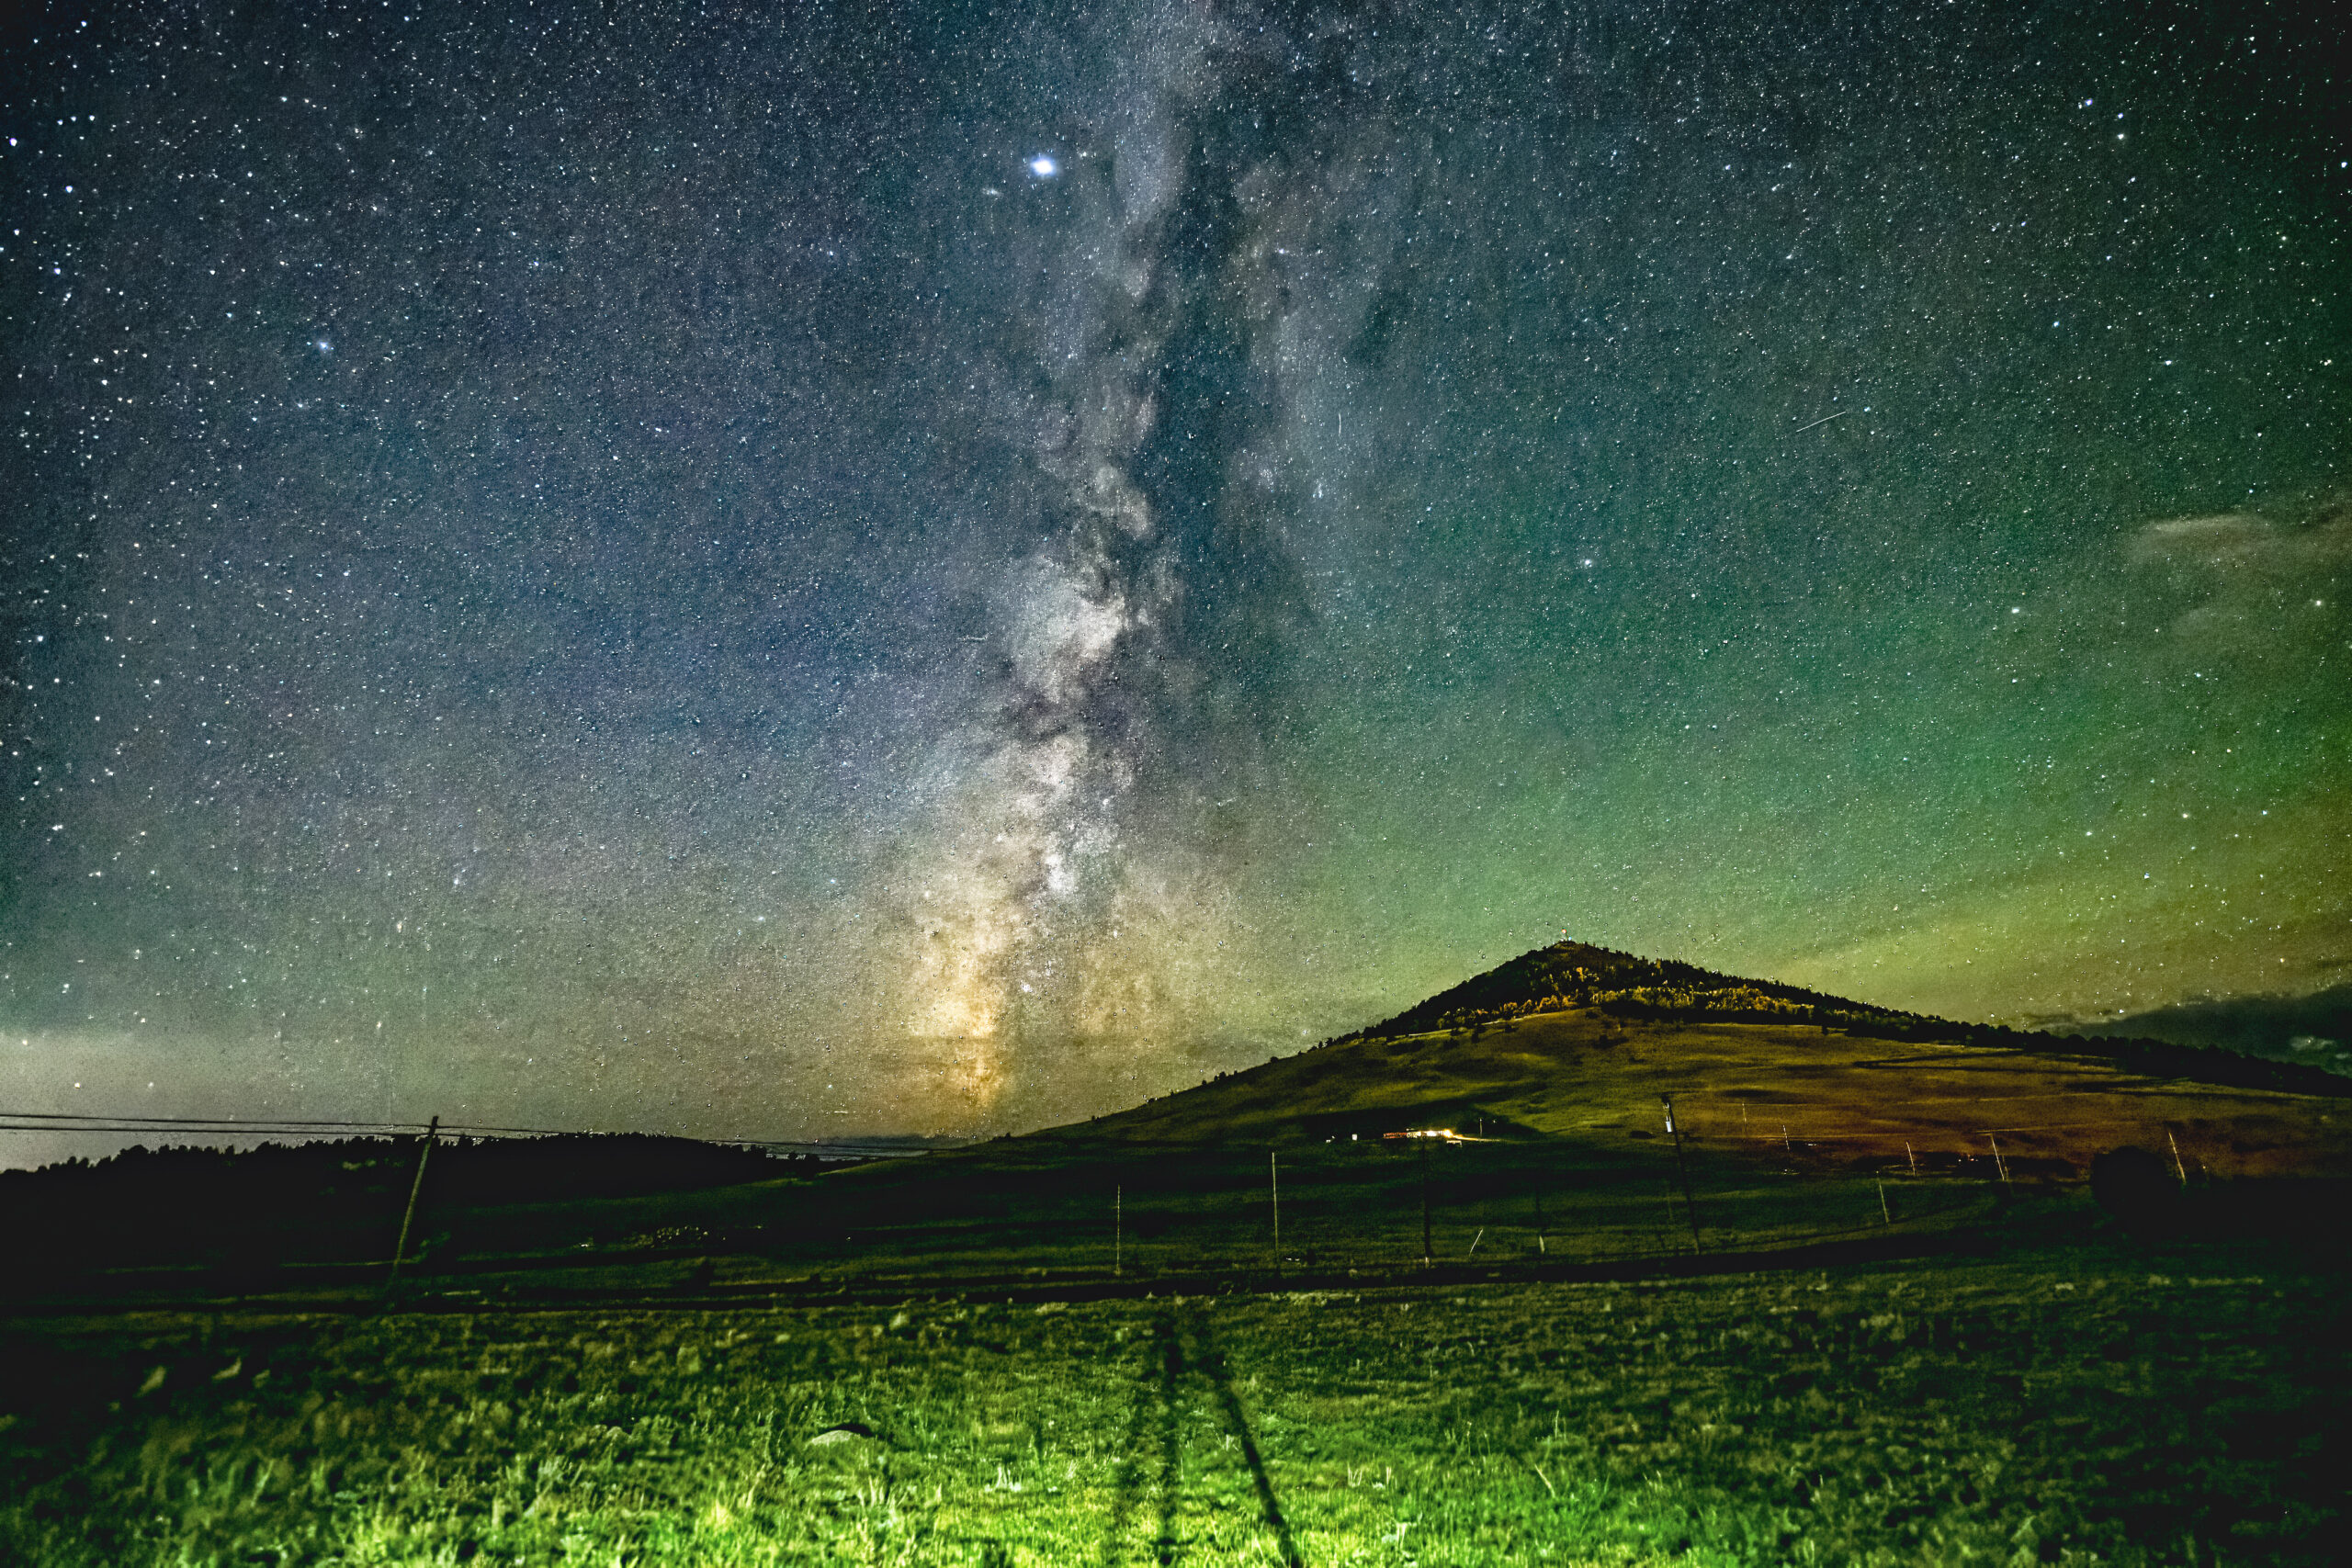
After: My Finished Edit
My Photoshop Workflow
When I open a RAW file for editing, it opens in Adobe Camera Raw. Most of my photographs are taken at night, and I return to a familiar group of tools to work on noise, detail, light, and color. The order and strength of the adjustments vary with the photograph.
AI noise reduction. I usually begin by reducing noise. For the finished photograph shown here, denoising was my only use of AI.
Clarity and Dehaze. I test these controls to see how they affect the detail and contrast in the image. I compare the result as I work and keep the changes that improve the photograph.
Exposure and contrast. I work with Exposure, Highlights, Shadows, Contrast, Whites, and Blacks to balance the brightness and contrast. These controls help me bring attention to the parts of the photograph I want the viewer to see.
Bringing the foreground out of the shadows. In this photograph, the mountain was very dark. There was no moonlight, only starlight and a faint glow of light pollution from Cripple Creek, Colorado. I wanted the mountain to be a secondary subject beneath the Milky Way, so I selectively increased the foreground exposure during editing. My goal was to reveal it a little more while preserving the feeling of a nighttime scene.
Color Grading. I also use Color Grading to refine the balance of color and brightness. Its hue, saturation, and luminance controls work with the shadows, midtones, and highlights, giving me another way to shape the appearance of the photograph.
Other tools I use when needed include Crop, Lasso, gradients, and Remove. My choices depend on the image and what I want to achieve. The tools described here are a starting point for understanding my approach; the adjustments will vary with the photograph you are editing.
Related guide: Why Your Stars Can Blur Even With a Tripod And Star Tracker.
Comments
One response to “Behind the Photograph: My Milky Way Gear And Photoshop Edit”
[…] Michael’s Milky Way gear and Photoshop edit for a real example of a single-frame night photograph, or read Why Your Stars Can Blur Even With a […]